Fast API의 기능을 간단히 익힌 상태에서, API와 python으로 간단히 웹을 만들 수 있는 streamlit을 이용해 간단한 계산기를 만들어 보자
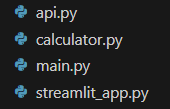
api.py: Fast api 모듈
calculator.py: 계산기 모듈
streamlit_app.py: streamlit 모듈
main.py: Fast api와 streamlit을 실행하는 메인 모듈
우리는 streamlit을 통해 웹 화면에서 x, y 두 float 값과 operator(+, -, /, *)를 입력 -> 입력된 값이 api를 통해 결과를 반환 -> 반환된 결과가 다시 streamlit 웹 화면에 게시되도록 할 예정이다.
1. Fast API
이 부분에서는 API 통신을 통해 계산기 인자를 받아 결과를 뱉어내도록 만드는 것이 목표다.
1-1. API 모듈
from fastapi import FastAPI # api 모듈
from pydantic import BaseModel # api 값 검증 모듈
import calculator # 사용자 계산기 모듈
app = FastAPI()
@app.get("/", description="main route")
async def get_root_route():
return {"message":"hello world"}
class formula(BaseModel):
"""
pydantic 모듈을 활용해 x, y, operator값 type 지정
"""
x: float
y: float
operator: str
@app.post("/calculator", description='계산식을 사용자가 인풋으로 넣습니다.')
async def input_formula(Input:formula):
"""
Input을 우리가 지정한 class를 받아 계산기 각 인자(x,y,operator) 할당
여기서 type 검증된 값이 들어감
return: 계산기 모듈의 리턴 결과
"""
result = calculator.calculate_values(x=Input.x, y=Input.y, operator=Input.operator)
return result
1-2. 계산기 모듈
def calculate_values(x, y, operator):
"""
두 수에 대한 기본적인 사칙연산 수행
: 곱하기, 나누기, 더하기, 빼기
return: 두 수의 사칙연산 결과
"""
if operator=='+':
val = x+y
elif operator=='-':
val = x-y
elif operator=='/':
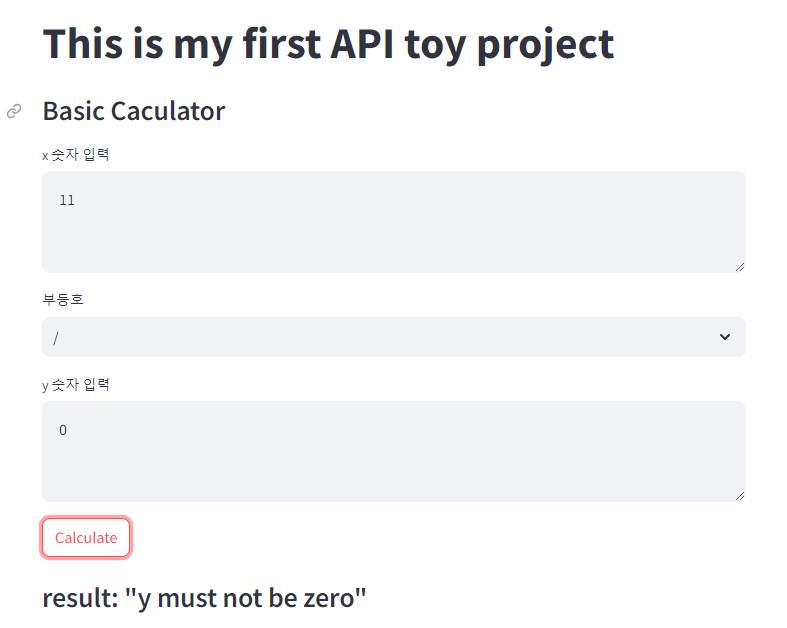
if y==0:
val = 'y must not be zero'
else:
val = x/y
elif operator=='*':
val = x*y
return val
2. Streamlit
import streamlit as st
import json
import requests
# 사용자가 웹에서 보이는 화면
# 두 수를 사용자는 입력하고 연산자를 선택
# 결과를 dictionary로 받아 fast api로 requerts모듈을 활용해 post -> fast api로부터 결과를 받아옴
# 웹 상에서 결과를 보여줌
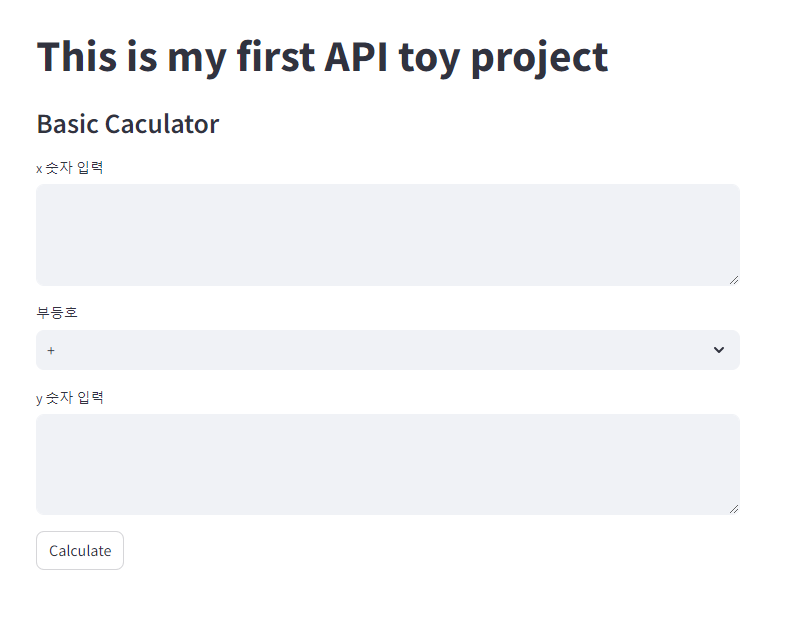
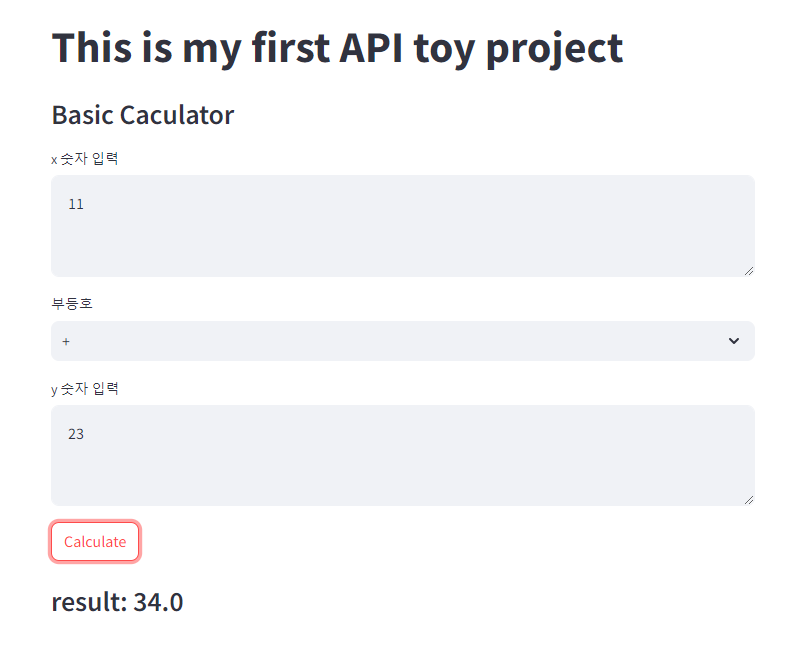
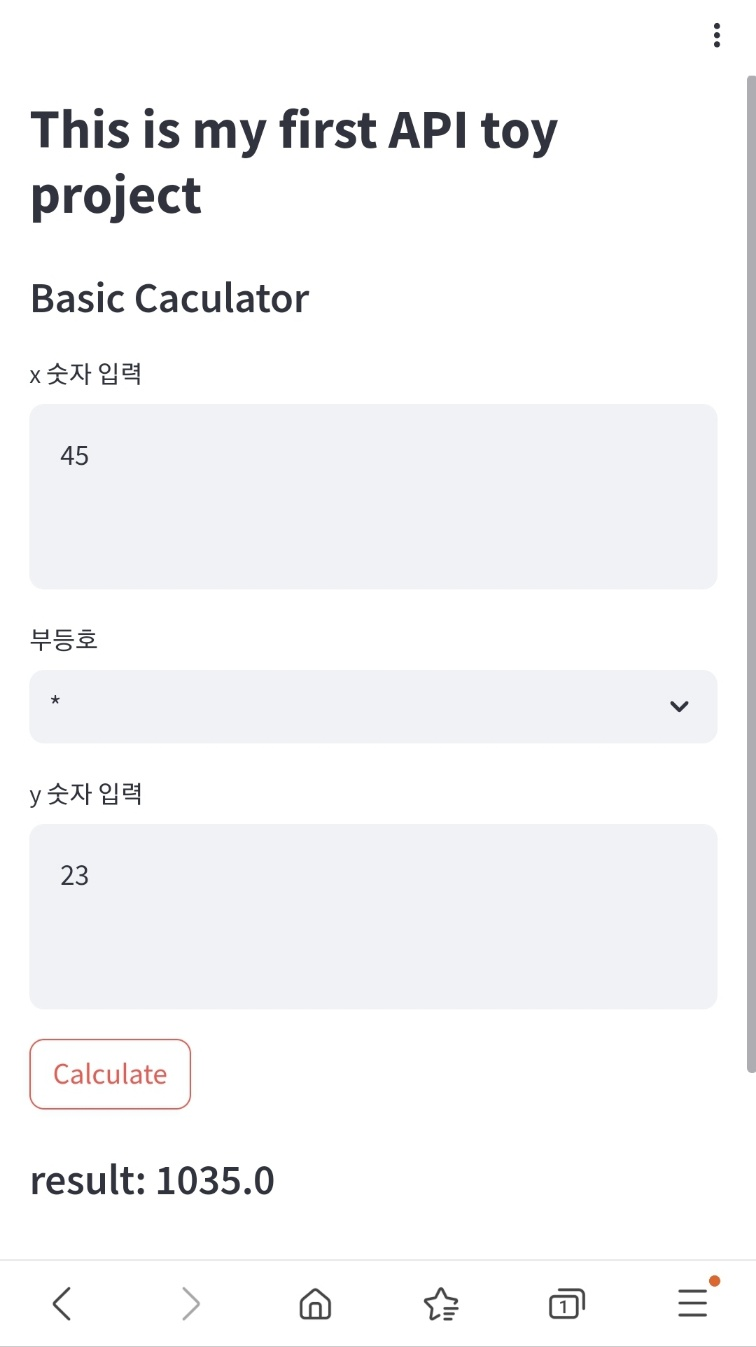
st.title("This is my first API toy project")
st.subheader("Basic Caculator")
x = st.text_area('x 숫자 입력') # number_input하면, format 등 지정 번거로움 -> api에서 pydantic 검증을 통해 float로 인풋됨
operator = st.selectbox("부등호", ("+", "-", "/", "*"))
y = st.text_area('y 숫자 입력')
info_dict = {'x':x, 'y':y, 'operator':operator}
# it returns a True if the button was clicked on the last run of the app, and False otherwise.
if st.button('Calculate'):
result = requests.post(url='http://{your fixed PC IP}:8000/calculator', data=json.dumps(info_dict), verify=False)
st.subheader(f"result: {result.text}")
requerts.post에서 url 인자에 127.0.0.1을 하면 localhost 지정이고,
고정 IP 지정 시, 서버가 열렸을 때 동일한 네트워크 사용중이면 폰에서도 볼 수 있음
- 고정 ip 지정 후 {}는 제거
3. 최종
import threading
import subprocess
def run_streamlit():
subprocess.run(['streamlit', 'run', 'streamlit_app.py'])
def run_fastapi():
subprocess.run(['uvicorn', 'api:app', '--reload', '--host={your fixed PC IP}'])
if __name__=="__main__":
# Streamlit을 실행하는 스레드 시작
streamlit_thread = threading.Thread(target=run_streamlit)
streamlit_thread.start()
# FastAPI를 실행하는 스레드 시작
fastapi_thread = threading.Thread(target=run_fastapi)
fastapi_thread.start()
# 두 스레드가 모두 종료될 때까지 대기
streamlit_thread.join()
fastapi_thread.join()
- 고정 ip 지정 후 {}는 제거(2번 위 설명과 동일)
fast api 서버와 streamlit 서버를 동시에 열어야 되므로, threading 모듈 활용해 동시 작업 수행
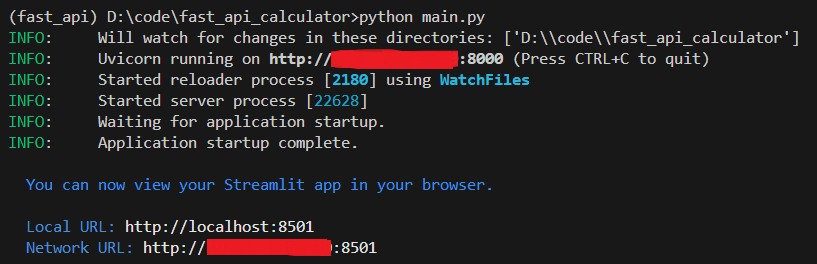
고정 IP로 진행하여 폰으로도 결과를 확인할 수 있었음
튜토리얼을 따라만 치다가 한 번 직접해보니까 동작 원리를 잘 이해할 수 있었다
데이터 과학 분야에서 분석 결과를 잘 활용할 때 이런 방법을 잘 응용하면 좋을 거 같다고 느낌
반응형
'Python > API' 카테고리의 다른 글
| Fast API Tutorial(3): query parameters (0) | 2024.02.24 |
|---|---|
| Fast API Tutorial(2): path parameters (0) | 2024.02.23 |
| Fast API Tutorial(1): introduction (0) | 2024.02.23 |


